Before cutting printed, painted or embroidered designs on materials with camera tracing system, you need to prepare materials with additional mark points, along with original designs.
Table of Contents
Get Familiar with Mark Point Types
There’re several mark point types allowed in the camera tracing software, you should get yourself familiar with them before start preparing designs and materials.
- Mark Point Types
In the camera tracing software, activate the Model Set pane. In the Type dropdown list, you can find mark point types the software supports.
The software supports using cross, circle, square, triangle, etc. filled with black or white as mark points. We recommend use cross type mark points, it is generally easy to be distinguished with other elements in the original design.
Do NOT use a mark point type with similar elements around it in the original design
The software would treat all elements as mark points if there're several elements which are similar enough with each other in the searching area.
Prepare Designs for Printing, Painting or Embroidering
You need to have the original design as the start point. For example, we have a T-shirt painting design, shown as below.
- Original Design
Put three cross mark points around the original design, then paint them together on the material.
- Design with Mark Points
If you want to cut more than one piece at a time, you should duplicate the original design first, then put mark points around them. The camera tracing system will not look for mark points of every single design, but treat them as a whole piece, then finish all cutting in one pass.
- Two Pieces of Design with Mark Points
Prepare Designs for Cutting
Use the design for printing, painting or embroidering as the start point. In your design software, add cutting path, and remove the original design, then export to a DXF file together with the mark points. Please add cutting path for every single duplicated design if you want to cut more than one piece at a time.
- Cutting Design
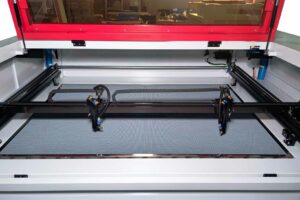
Camera Tracing and Cutting
Finally, in the camera tracing software, import the DXF file, specify mark points one by one, set cutting parameters, move the camera on top of the first mark point, then you can start camera tracing and cutting progress.
- Tracing and Cutting Progress
The camera tracing system will try to recognize mark points one by one according to the position relationship in the cutting design at the beginning. Then calculate the real position of the designs on the material if the mark points tracing progress succeeded. And cut them off according to the real position at the end.